
도찐개찐
Spring Security 일회성 Api Key 추가 본문
Spring Security 스프링 시큐리티
스프링 시큐리티에 대해 간단하게 개념 정리를 하고 단순 시큐리티를 적용해봅니다. 스프링 시큐리티 대략적인 기능 사용자 권한에 따른 URI 접근 제어 DB와 연동 하는 Local strategy 로그인 쿠키를
dev-truly.tistory.com
세 가지를 만들어야 합니다.
- 보유할 토큰 "principal", "credentials"
- 요청에서 앞서 언급한 Token을 생성하기 위한 Filter를 사용하여 인증 "AuthenticationManager"하고 "AuthenticationSecurityContextHolder"
- "AuthenticationManager"토큰을 인증하는 데 사용할 인증 공급자 입니다.
Spring Initializer 을 사용하여 Spring Boot 프로젝트를 생성하는 것으로 시작하겠습니다.
여기에 두 가지 종속성이 필요합니다. Web그리고 Security.
1. Api-Key 설정
먼저 내 API 키를 application.properties 또는 application.yml 내에 사용하길 원하는 api-key를 등록 해주시면 됩니다.
# application.properties
external.api-key=abc

# application.yml
external:
    api-key: abc
2. 사용자 지정 인증 토큰 생성
사용자 지정 인증 토큰은 apiKey를 보유합니다.
import org.springframework.security.authentication.AbstractAuthenticationToken;
import org.springframework.security.core.authority.AuthorityUtils;

public class ApiKeyAuthToken extends AbstractAuthenticationToken {

    private String apiKey;

    public ApiKeyAuthToken(String apiKey) {
        super(AuthorityUtils.NO_AUTHORITIES);
        this.apiKey = apiKey;
    }

    @Override
    public Object getCredentials() {
        return this.apiKey;
    }

    @Override
    public Object getPrincipal() {
        return "admin";
    }
}
3. 사용자 지정 인증 공급자 생성
- "2"에서 생성한 사용자 지정 토큰을 인증하기 위해 ApiKeyAuthToken
- 지원하는 사용자 지정 인증 공급자를 만듭니다.
사용자 지정 인증 공급자는 API 키가 유효한지 확인합니다. 그렇지 않은 경우 인증 공급자는 예외를 throw합니다. 프로덕션 애플리케이션에서 올바른 HTTP 응답 코드로 정상적으로 처리될 사용자 지정 예외를 생성할 수 있습니다.
import org.springframework.beans.factory.annotation.Value;
import org.springframework.context.annotation.PropertySource;
import org.springframework.security.authentication.AuthenticationProvider;
import org.springframework.security.authentication.BadCredentialsException;
import org.springframework.security.core.Authentication;
import org.springframework.security.core.AuthenticationException;
import org.springframework.stereotype.Component;

@Component
public class ApiKeyAuthProvider implements AuthenticationProvider {

    @Value("${external.api_key}")
    private String apiKey;

    @Override
    public Authentication authenticate(Authentication authentication) throws AuthenticationException {
        ApiKeyAuthToken apiKeyAuthToken = (ApiKeyAuthToken)authentication;
        if (apiKeyAuthToken.getCredentials().equals(apiKey)) {
            apiKeyAuthToken.setAuthenticated(true);
        }
        else {
            throw new BadCredentialsException("The API key was not found or not the expected value.");
        }
        return apiKeyAuthToken;
    }

    @Override
    public boolean supports(Class<?> authentication) {
        return authentication.equals(ApiKeyAuthToken.class);
    }
}
4. 토큰 생성, 인증을 요청하는 필터 생성
import org.springframework.security.authentication.AuthenticationManager;
import org.springframework.security.core.context.SecurityContextHolder;
import org.springframework.web.filter.GenericFilterBean;

import javax.servlet.FilterChain;
import javax.servlet.ServletException;
import javax.servlet.ServletRequest;
import javax.servlet.ServletResponse;
import javax.servlet.http.HttpServletRequest;
import javax.servlet.http.HttpServletResponse;
import java.io.IOException;
import java.util.Optional;

public class ApiKeyAuthFilter extends GenericFilterBean {

    private AuthenticationManager authenticationManager;

    public ApiKeyAuthFilter(AuthenticationManager authenticationManager) {
        this.authenticationManager = authenticationManager;
    }

    @Override
    public void doFilter(ServletRequest request, ServletResponse response, FilterChain chain) throws IOException, ServletException {
        HttpServletRequest httpServletRequest = (HttpServletRequest)request;
        HttpServletResponse httpServletResponse = (HttpServletResponse)response;

        Optional<String> apiKey = Optional.ofNullable(httpServletRequest.getHeader("X-Api-Key"));

        if (apiKey.isPresent()) {
            ApiKeyAuthToken apiKeyAuthToken = new ApiKeyAuthToken(apiKey.get());
            SecurityContextHolder.getContext().setAuthentication(authenticationManager.authenticate(apiKeyAuthToken));
        }

        chain.doFilter(httpServletRequest, httpServletResponse);

    }
}
5. Security 구성 업데이트
WebSecurityConfigurerAdapter로 주석이 달린 확장된 보안 구성 클래스입니다 @EnableWebSecurity
@Configuration
@EnableWebSecurity
public class SecurityConfig extends WebSecurityConfigurerAdapter {

    // Rest of the code
}
이제 보안 구성을 사용자 지정하기 위해 구성 메서드를 재정의를 해줍니다.
@Override
protected void configure(HttpSecurity http) throws Exception {
    http.
                antMatcher("/api/**")
                .csrf().disable()
                .authorizeRequests()
                .anyRequest().authenticated()
                .and()
                .addFilterBefore(new ApiKeyAuthFilter(authenticationManager()), UsernamePasswordAuthenticationFilter.class);
}
.antMatcher("/api/**") : api/** 붙은 경로 요청에만 처리 될 수 있도록 지정
.authorizeRequests() : 요청에 대한 권한 지정
.anyRequest().authenticated() : 인증이 되어야 권한 부여
Security Filter chain 에 "UsernamePasswordAuthenticationFilter" 전에 "ApiKeyAuthFilter"를 1번 인자로 전달 함으로써 우선권을 가짐
6. 컨트롤러 작성
이제 컨트롤러에 대한 또 다른 패키지를 만들고 거기에 controller두 가지 GET메서드를 작성합니다.
import org.springframework.http.HttpStatus;
import org.springframework.http.ResponseEntity;
import org.springframework.stereotype.Controller;
import org.springframework.web.bind.annotation.GetMapping;
import org.springframework.web.bind.annotation.RequestMapping;

@Controller
@RequestMapping(path = "/api/auth")
public class AuthApiController {
    /**
     * Api key가 유효한지 체크하기 위한 api
     *
     * @return
     */

    @GetMapping("check")
    public ResponseEntity<Object> check() {
        return ResponseEntity.status(HttpStatus.OK).body(true);
    }
}
7. 테스트
Curl 명령어 실행 테스트
# Header 미전달 케이스(에러 발생)
$ curl -X GET http://localhost:8090/api/auth/check
# 잘못된 인증키 전달 케이스(에러 발생)
$ curl -X GET -H "X-Api-Key: test" http://localhost:8090/api/auth/check
# 정상 정보 전달 케이스
$ curl -X GET -H "X-Api-Key: abc" http://localhost:8090/api/auth/check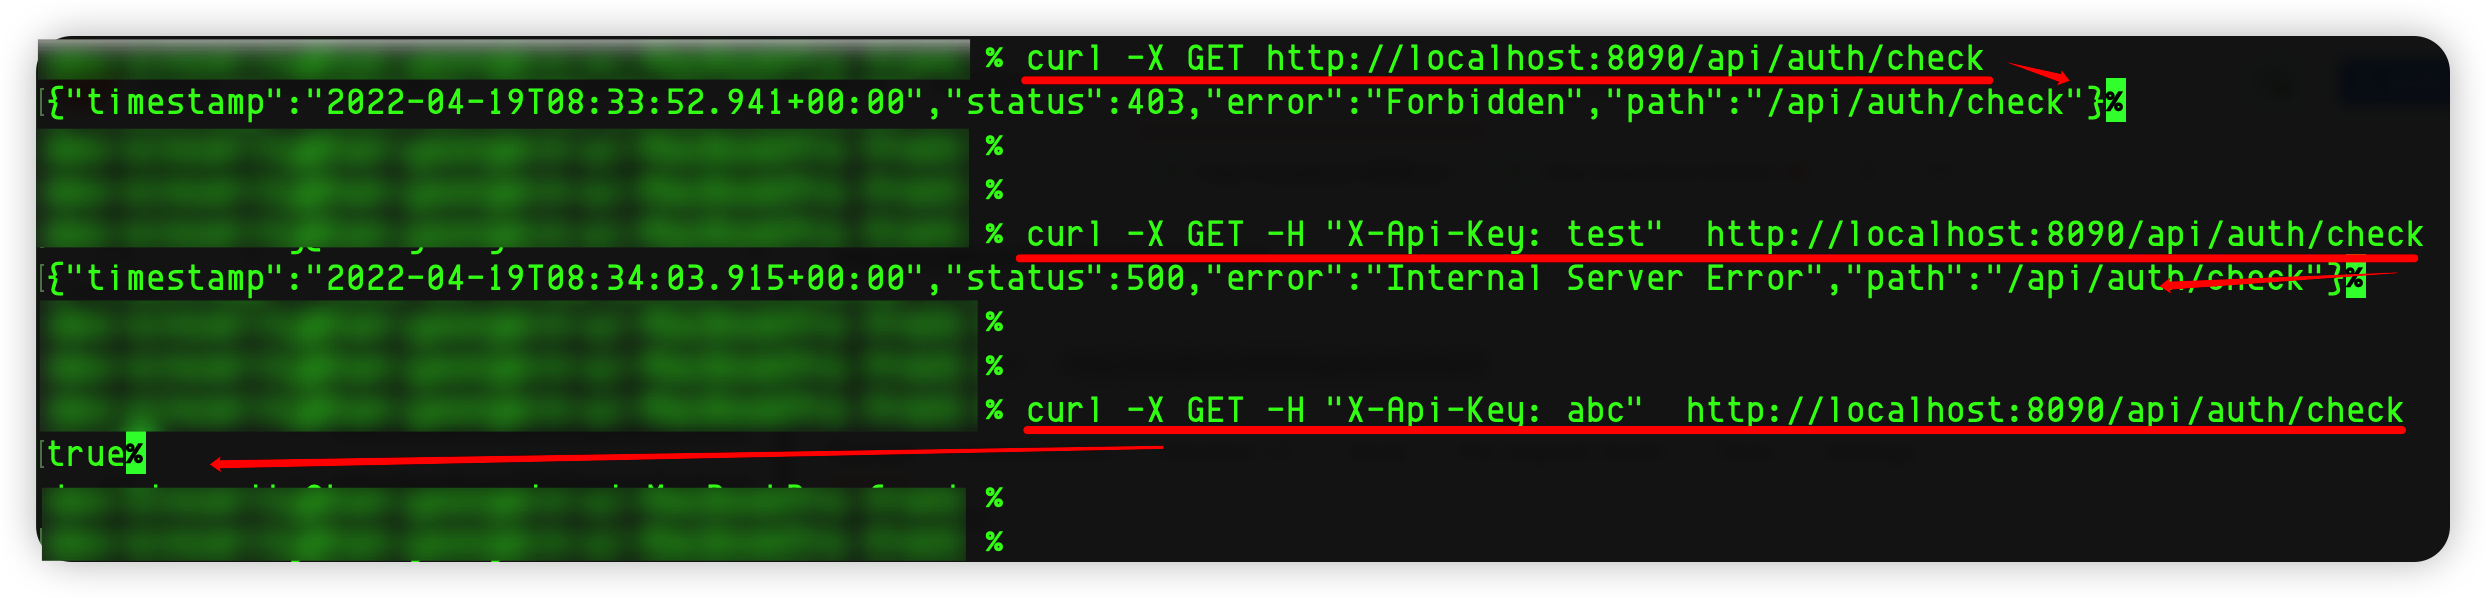
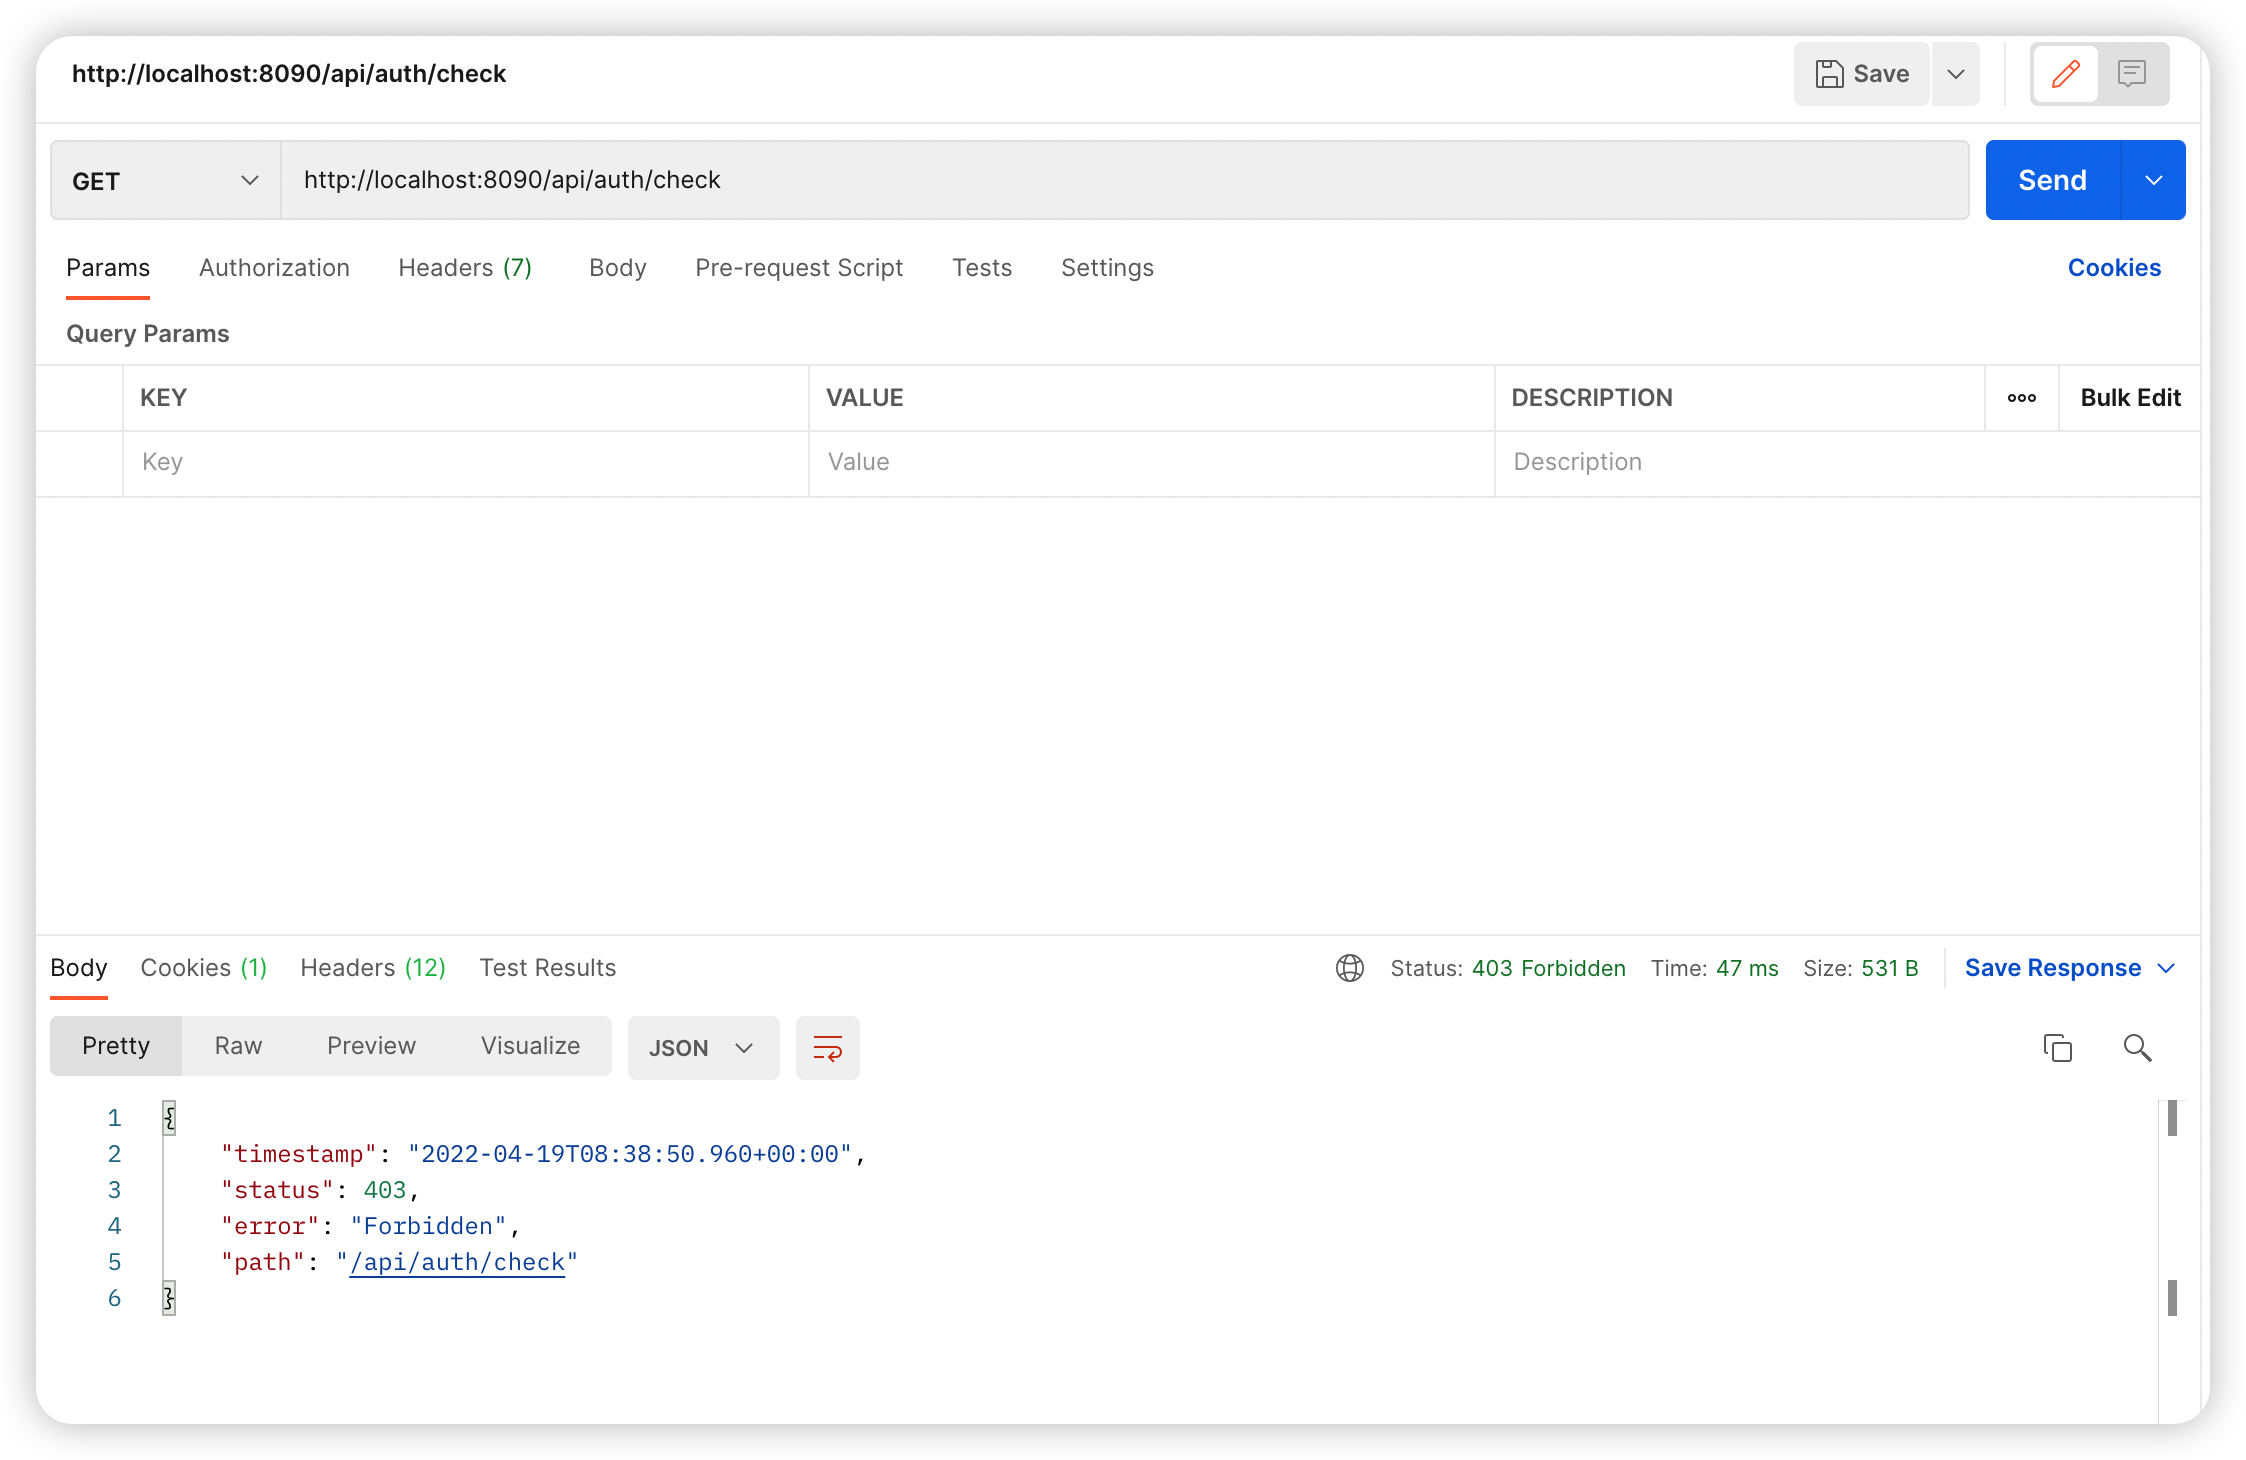
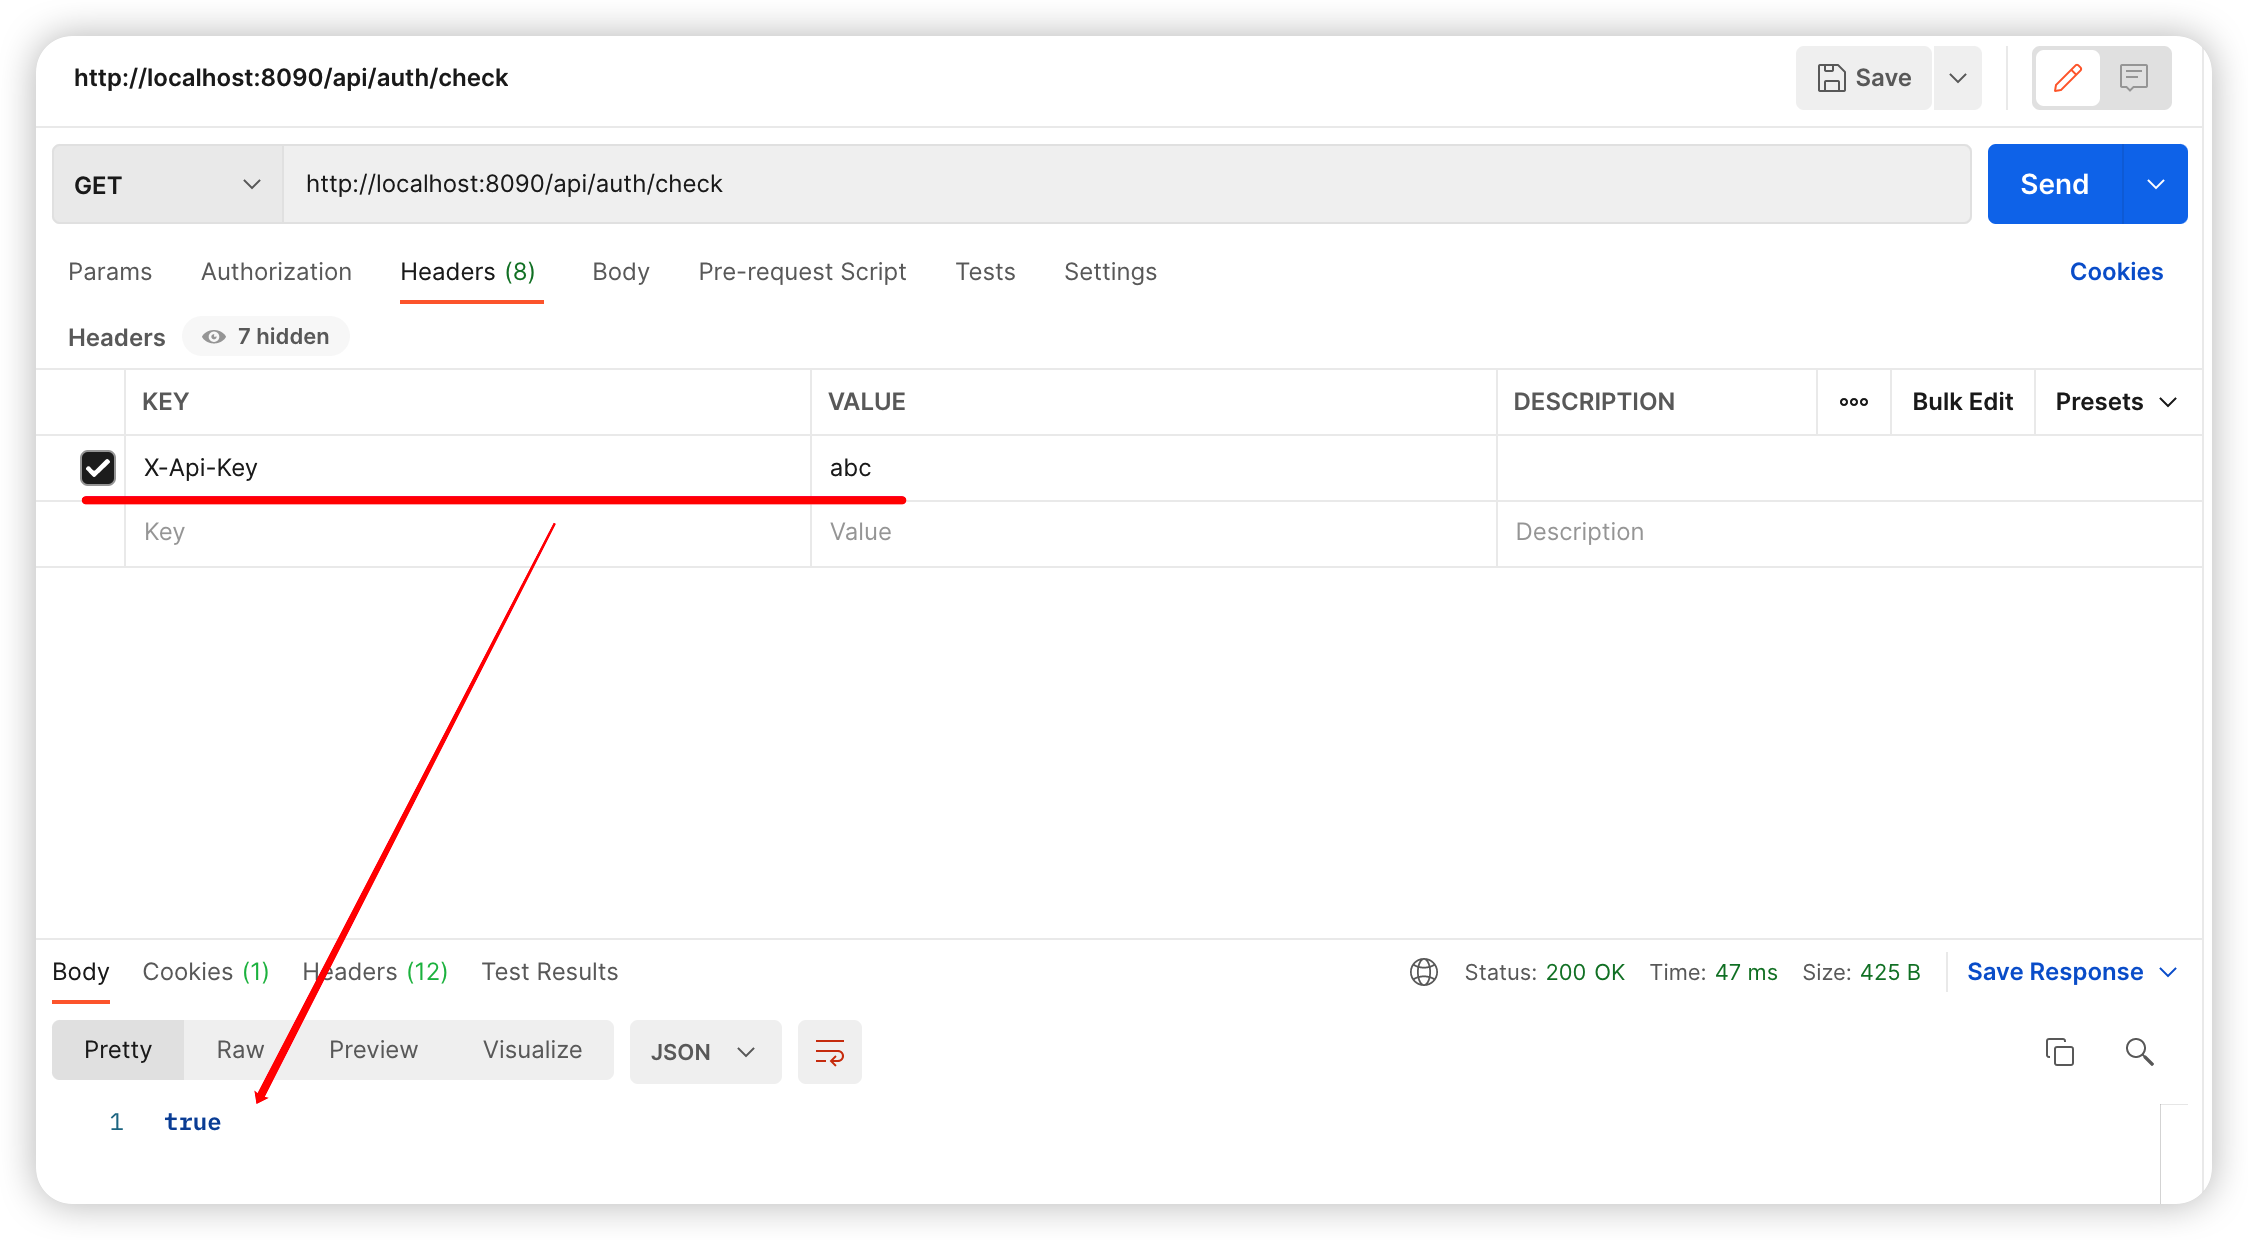
Postman 테스트
'JAVA > SpringBoot' 카테고리의 다른 글
| [Spring Boot] gradle 환경 log4j2 설정 (0) | 2022.10.23 |
|---|---|
| [SpringBoot] Swagger (0) | 2022.05.09 |
| [Spring Boot] CORS 설정하기 (0) | 2022.05.07 |
| Spring Security + JWT 회원가입, 로그인 구현 (0) | 2022.05.06 |
| Spring Security 스프링 시큐리티 (0) | 2022.04.19 |


